
How To Replace The Weather-Stripping On Your Garage Door
Damaged weather-stripping not only looks bad, it could be causing a variety of issues in your home. From raising your energy bills due to the gap in your garage door to letting unwanted critters into your home, it’s best to replace the weather-stripping as soon as possible to ensure that your home is protected.
What kind of damage does your garage weather-stripping have?
Whether it be caused by an accident or because of a critter, your weather-stripping insert might require a bit more inspection to see what can be done to fix it. If the insert is torn then you can simply replace it with a little bit of work. If the retainer is damaged, this might require more work and even garage door repair from a qualified professional to get in shape.
Replace The Existing Weather-Stripping
Replacing the u-shaped insert is easy and can be done by following a few simple steps. Before you begin you need to purchase a replacement for the insert. Replacement weather seals are available at any garage door retailer or home improvement store.
If you’re able to, bring a sample of the stripping that you have currently to ensure that the fit is correct and that you have no issue when installing it. It’s also a good idea to take a few measurements of your garage door to ensure that the one you get fits your garage door width and length.
Steps To Replace Weather-stripping From Your Garage Door
There are a variety of tools that you will need to use in order to replace the weather-stripping in your garage door. These include:
- Cordless drill
- Locking pliers
- Silicone-based lubricant
- Utility knife
- Protective eyewear
Once you have them you can follow the steps outlined below:
- Raise the height of the garage door: Raise the garage door to a height that works best for you and allows you to easily access the weather-stripping. Those with an electric garage door opener can easily find the height that works for them, but if you have problems you can always use a couple of locking pliers to set the height securely.
- Remove used weather-stripping: Remove the weather-stripping insert carefully from the retainer. If the insert is stuck to the retainer, you can use silicone-based lubricant to loosen it. If you don’t have silicone-based lubricant, you can use some dishwashing soap. If all else fails, cut one side of the insert in order to remove the rest of it from the retainer.
- Clean the retainer: Use a wet rag to remove any debris that could have entered the retainer, such as dirt or dry leaves.
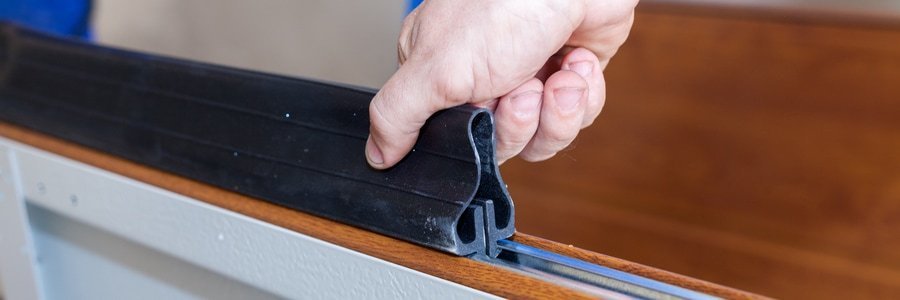
- Install the new weather-stripping insert: Prepare the weather-stripping and insert it carefully into the retainer. Don’t stretch the weather-stripping too tight, instead let it rest in the retainer. This job is easier if you have someone to help you add the insert through the retainer while you pull the insert with a pair of vice-grips.
- Trim the excess weather-stripping: Trim off any excess at each end of the door panel.
Do You Need To Replace More Than Weather-Stripping?
Replacing a small piece of a garage door might work for a while, but if you are in need of an upgrade let Hill Country Overhead Door help you. We offer a wide variety of residential garage doors to complement your home. Whether you’re in the market for a modern look or a more traditional carriage house door appearance, we are confident you will find the perfect door for your home.
If all you need is a simple garage door repair we can help with that as well. Contact us today to learn more about our wide selection of garage doors and other garage door services!